This is the best pie crust recipe I’ve ever used! I’ve been using this recipe for flaky pie crust for over 10 years and haven’t looked back. Don’t miss the helpful video that walks you through every step for guaranteed success.
Watch the Video
My favorite foolproof pie crust recipe guarantees perfect results every time. It’s so easy to roll out, and your pies will have a crust with the most wonderful light and flaky layers.
This easy recipe works beautifully for single or double crust pies, both sweet and savory. We recommend this pie dough for almost all the pies on Inspired Taste.
Key Ingredients
- Flour: I use all-purpose flour in this pie crust recipe and get consistently great results.
- Cold Butter: You want to use very cold butter when making pie crust.
- Salt: Use salt, even when making pie crust for sweet pies. It makes the crust taste amazing.
- Sugar: Is optional, but if I’m making sweet pies or even a quiche, I use it. We only add a tablespoon, which doesn’t really make the crust taste sweet, its more for balancing the flavor of the flour and butter.
- Cold water: Use icy cold water when you make pie crust.
The Secret to the Best Pie Crust
The secret to making the best pie crust is to coat a portion of the flour with cold butter before adding in the rest of your flour. This simple step guarantees a super flaky, light pie crust. Gluten forms when you mix flour and water. We want some gluten for structure, but too much will make your crust tough, dense, and less flaky.
Our tried and true pie crust recipe mixes a portion of the flour with our butter first. You can think about it as if we are giving the flour a butter raincoat, which make it difficult for the flour coated in butter to absorb water. In other words, it helps prevent too much gluten development. Less gluten = flakier and more tender pie crusts.
I learned this strategy of coating a portion of the flour in butter from Cooks Illustrated and Kenji López-Alt. I will be forever grateful!
How to Make Pie Crust
I use a food processor to make this pie crust. It’s quick and easy. Add a portion of your flour, salt, and sugar to your food processor. Pulse to combine, then add your cold butter.
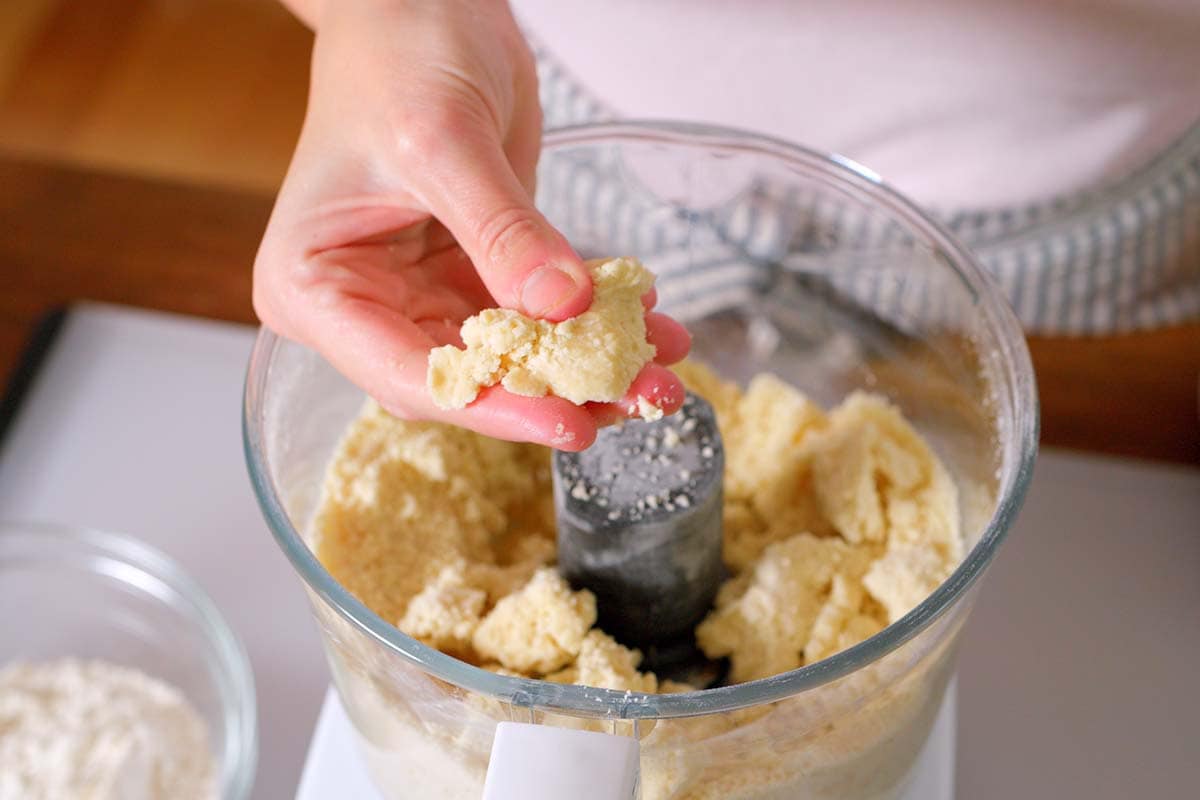
You’ll process until the flour is well coated with the butter (the flour actually changes color). Watch me do this in the video, or look at the photo below. I can press the flour and butter mixture together.
Now that the flour is well coated in the butter, you can pulse in the remaining flour until crumbly (it only takes a few seconds).
The last step is to bring the crust together using cold water. I do this by hand, scattering the cold water over a tablespoon at a time until the dough is wet enough to hold together (some crumbles are fine).
How to Make Pie Dough by Hand
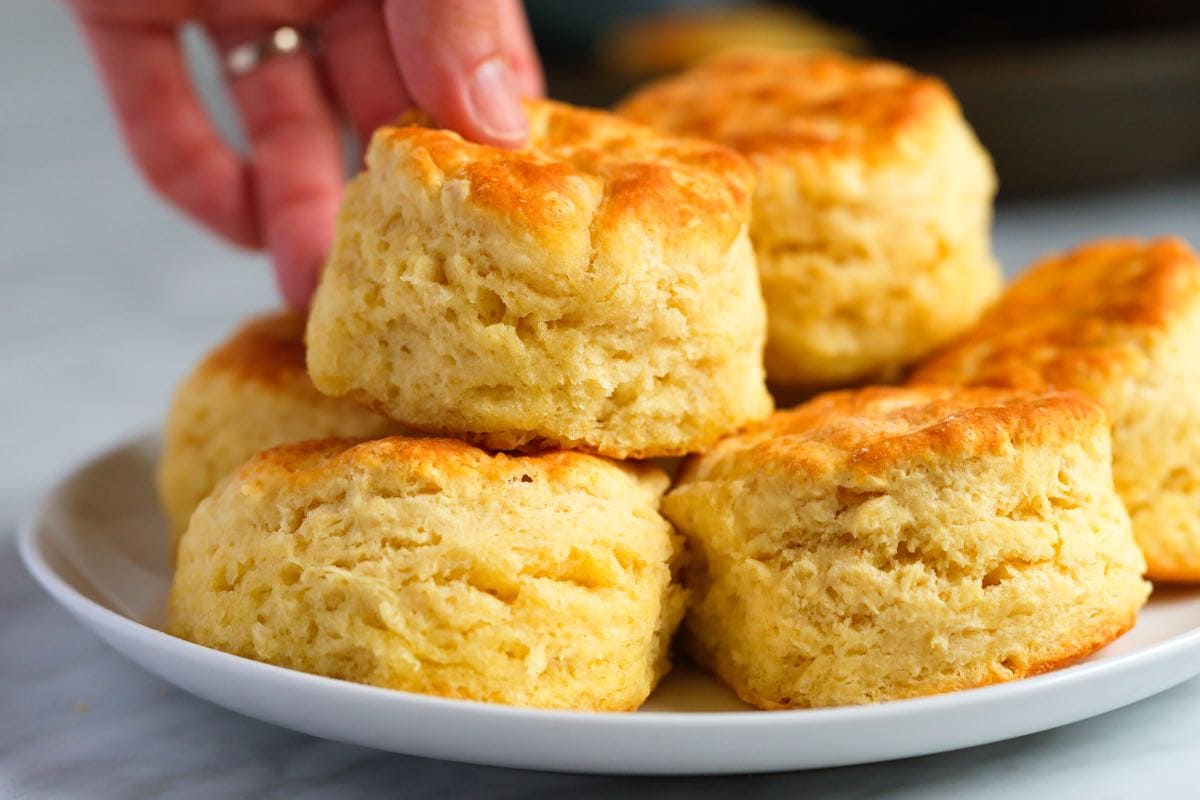
If you prefer to do all this by hand, you can! It will be just as easy to roll out and turns out super flaky. To make this pie crust by hand, we recommend using a pastry cutter to cut the butter into the flour (they are inexpensive and helpful for other recipes like biscuits and scones).
In our recipe video, we show making this recipe in a food processor and by hand using a pastry cutter. You’ll follow the same method as when we use a food processor. Combine a portion of the flour with your butter, and then add the remaining flour and water.
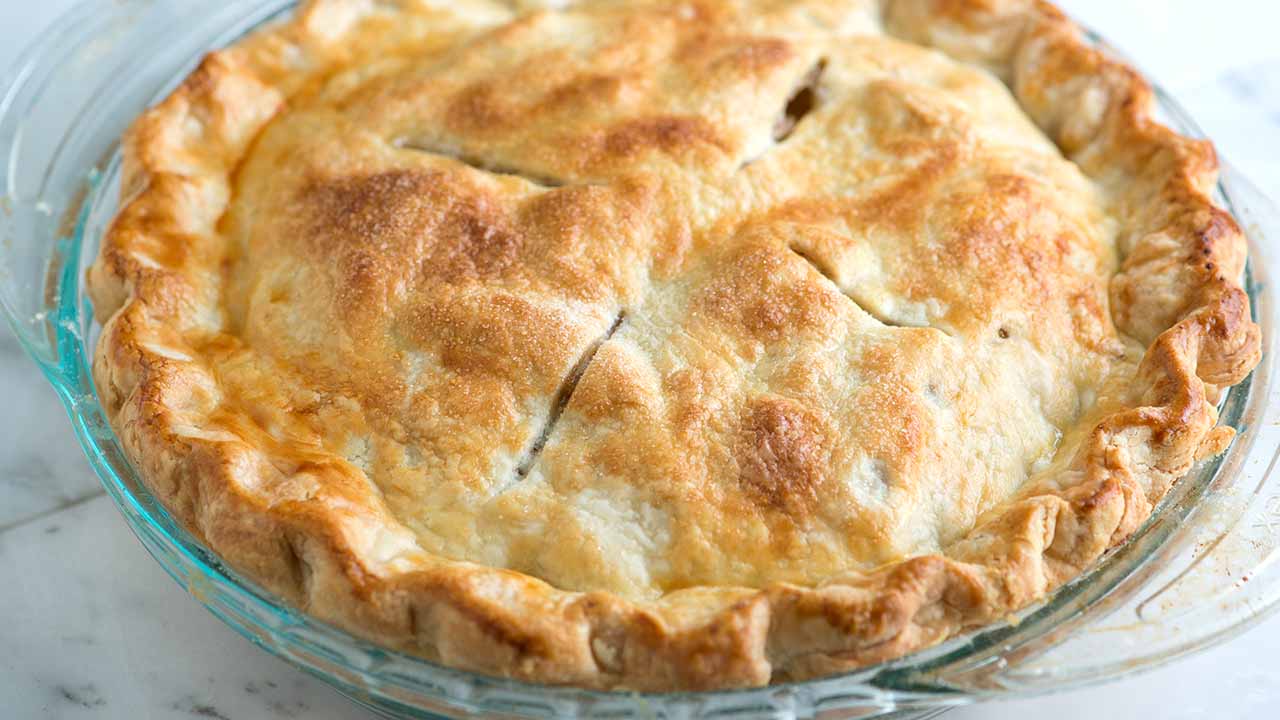
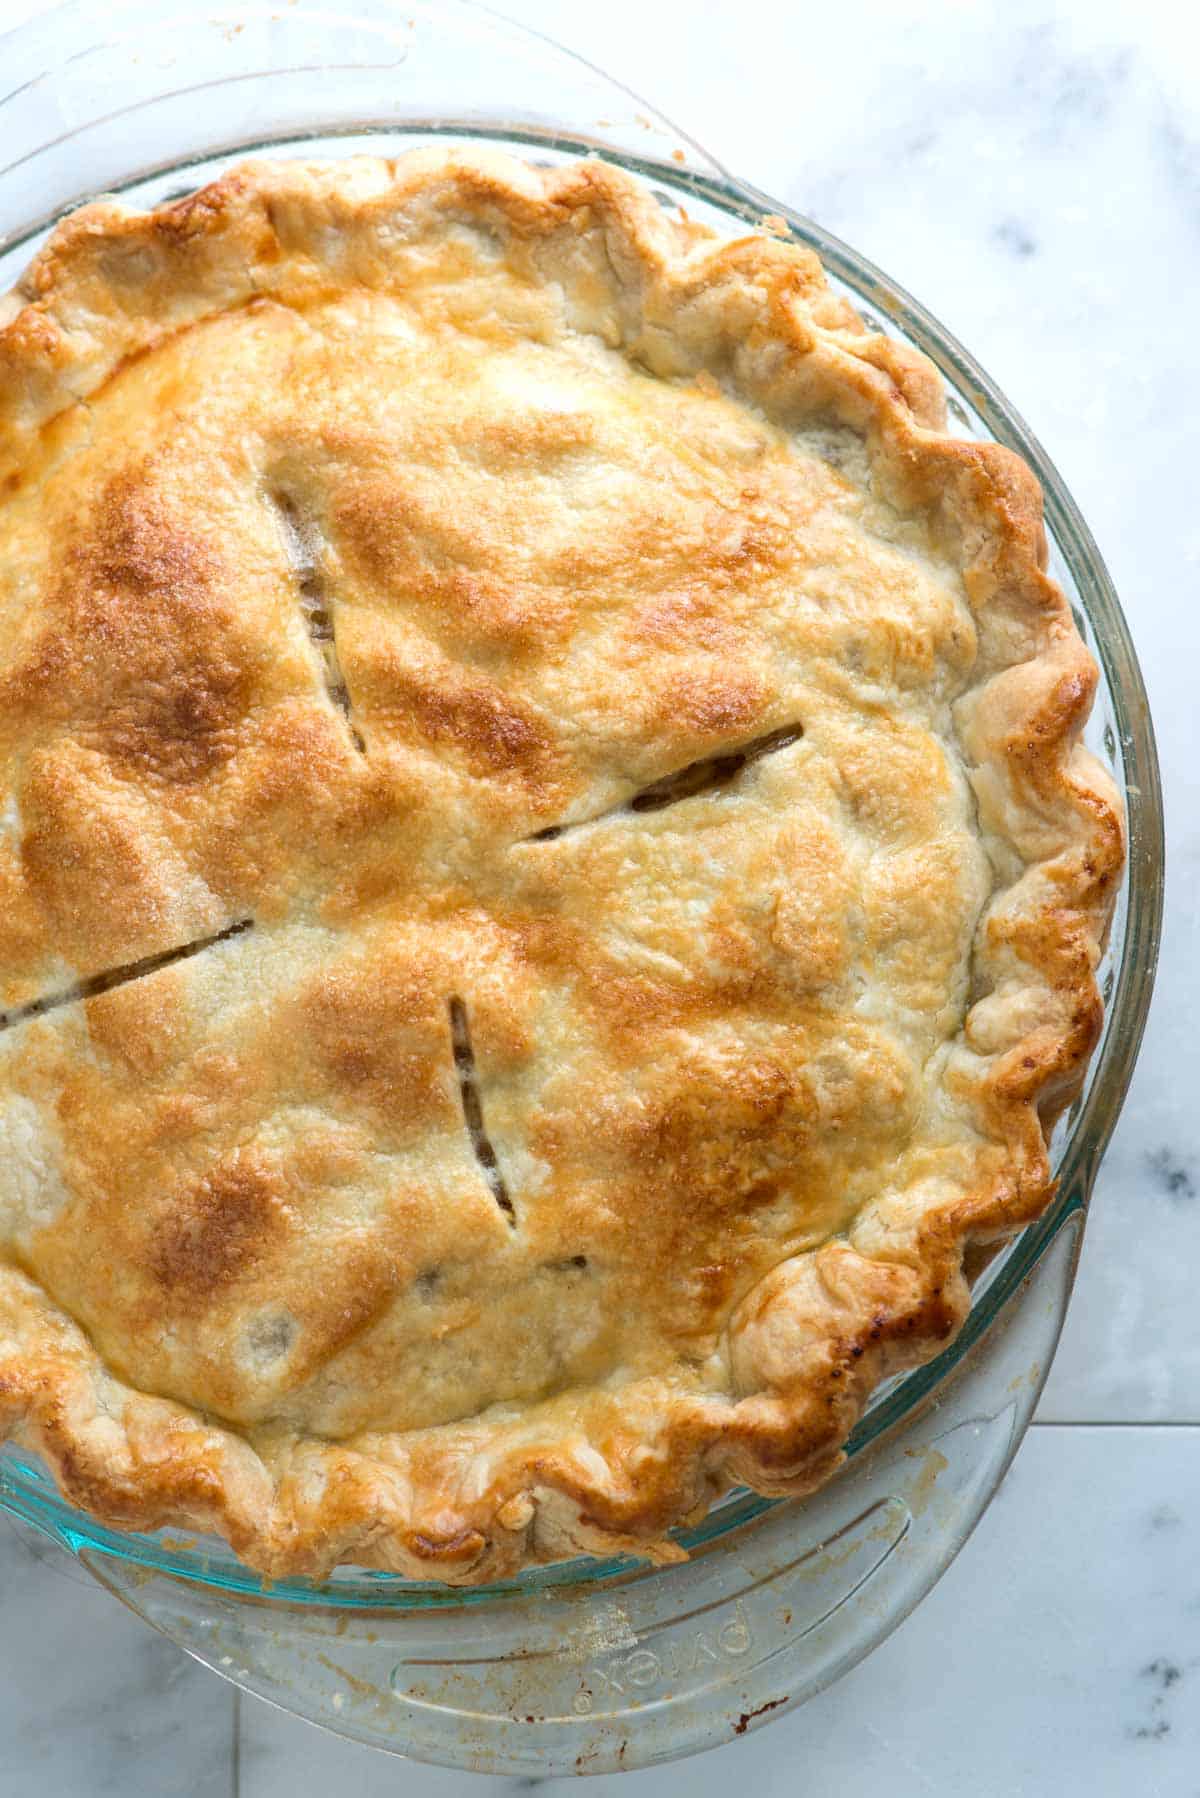
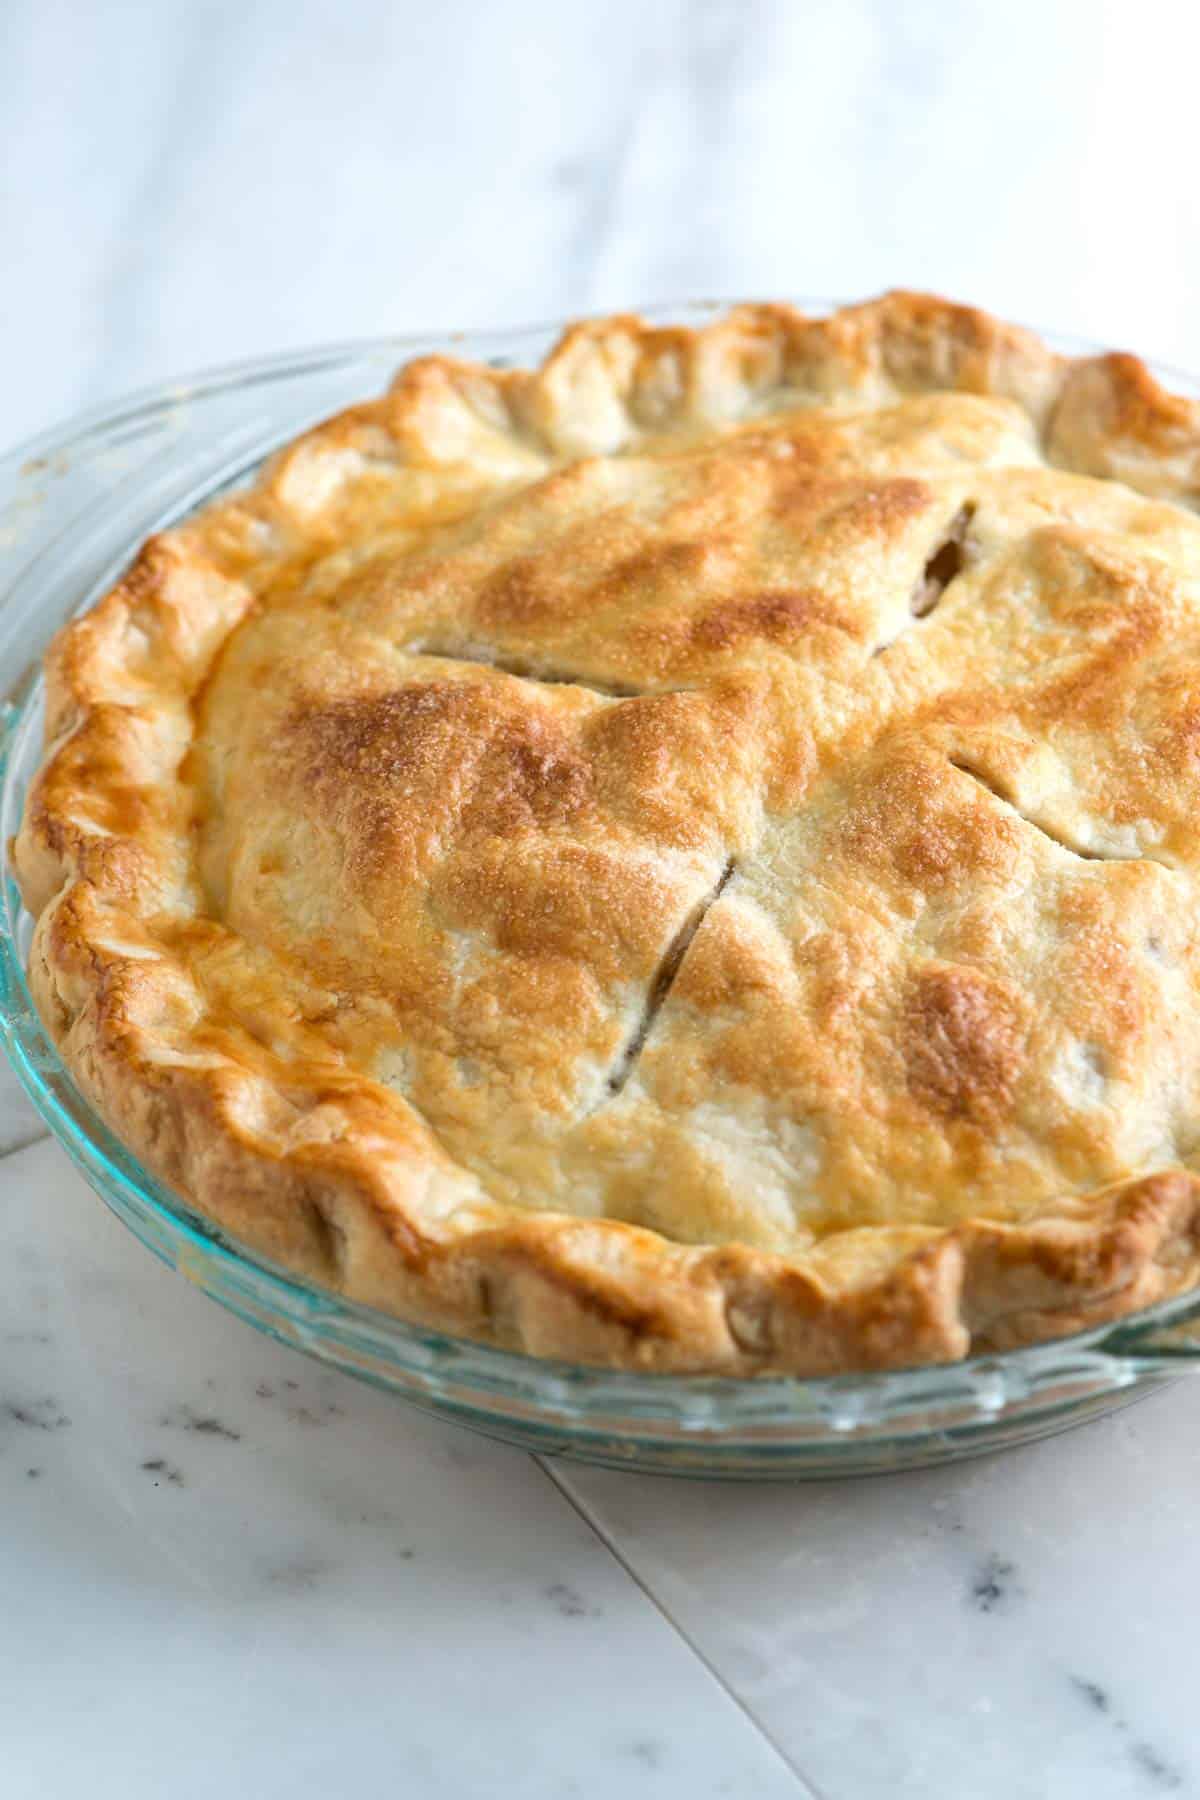
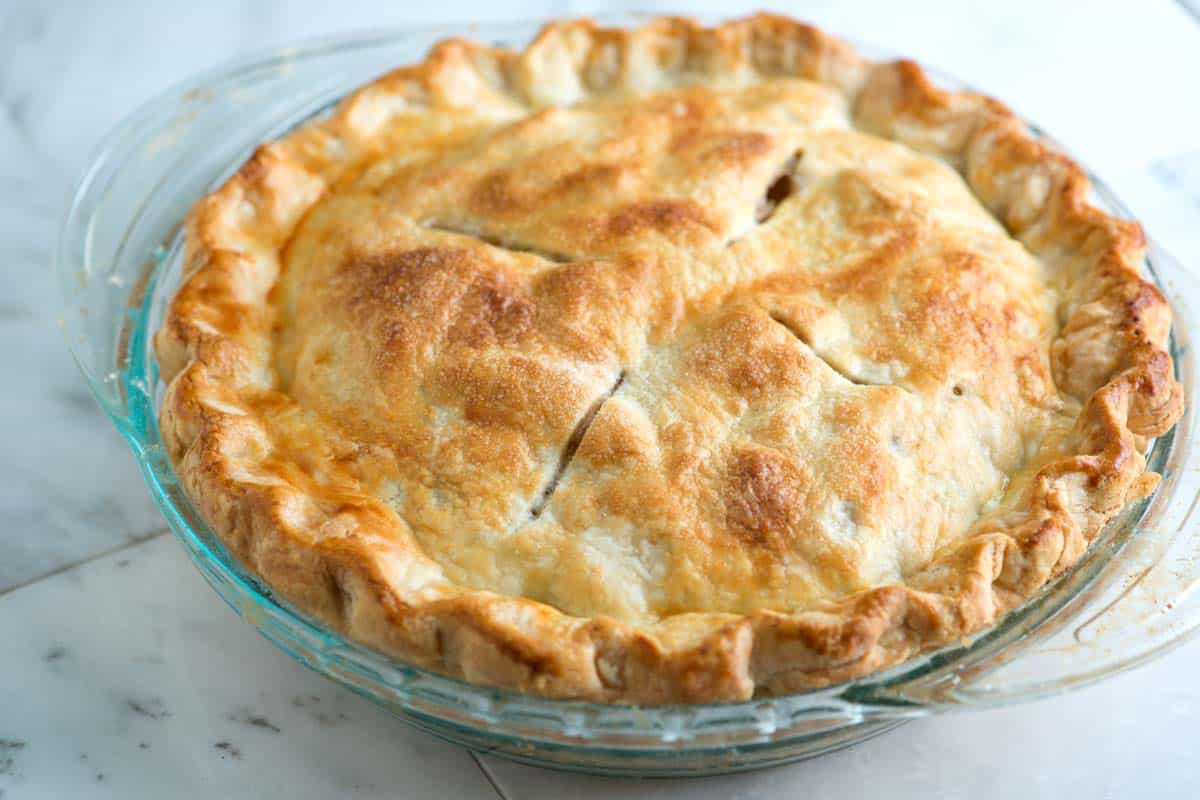
Here’s What Great Flaky Pie Crust Looks Like
Great pie crust is light enough to flake and doesn’t turn soggy from juicy fillings. It isn’t crumbly. Instead, the crust is made of long, thin layers of dough (see photo).

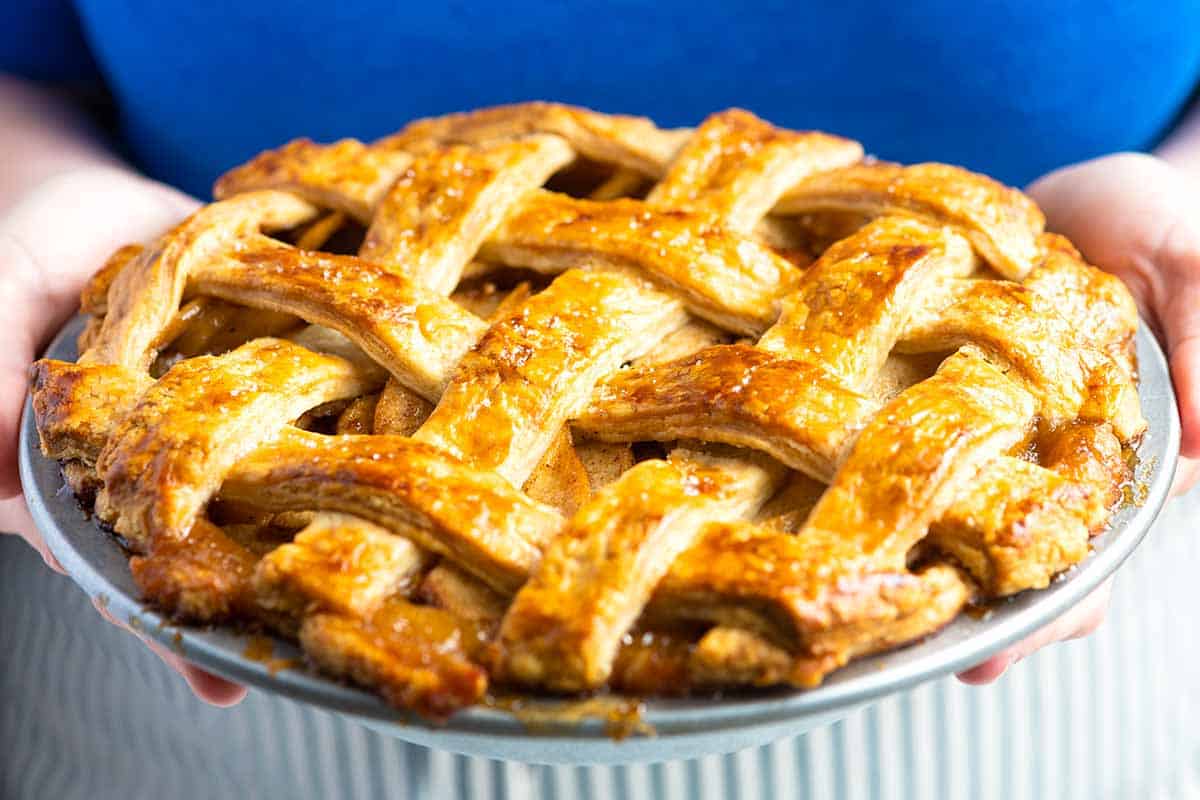
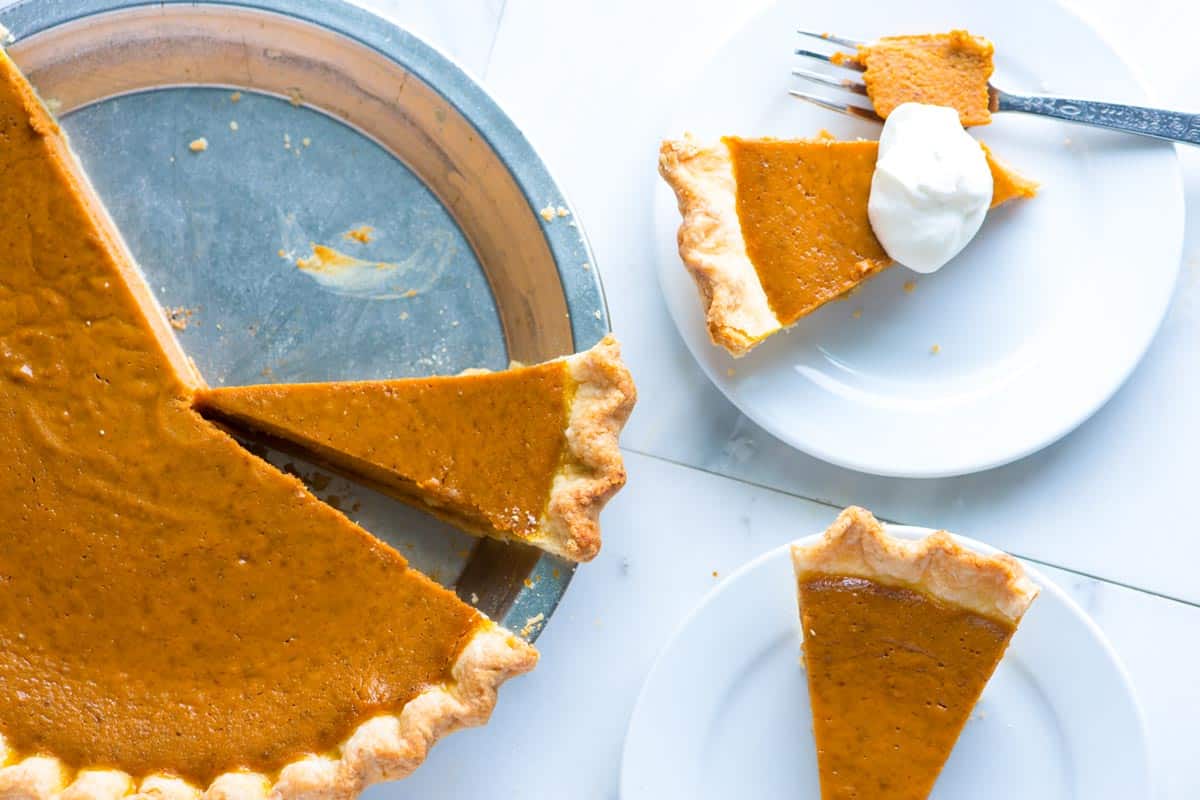
You can also see how amazing this crust is when looking at our recipe for apple pie with a lattice crust (the dough rolls out so nicely and makes it easy to add a beautiful lattice crust). Or look at this sweet potato pie. The bottom of the crust turns a beautiful golden brown and holds up so well against the wet sweet potato filling.
Making Pie Crust Ahead of Time
Wrapped well, pie dough lasts in the refrigerator for up to 3 days and in the freezer for 3 months. I use plastic wrap. Dough straight from the refrigerator can sometimes take a bit more time to roll out. If yours too cold to roll out, leave it on the counter for a few minutes to warm up slightly, and then try rolling it out again. Thaw frozen dough in the fridge overnight before using.
When freezing pie dough, tightly wrap in plastic wrap, and then place into freezer bags or an airtight container. You can also roll out your dough, form into a pie dish, and then freeze until hard. From there, you can place the pie dish into a freezer-friendly bag and store in the freezer for up to 3 months.
Easy Pie Recipes
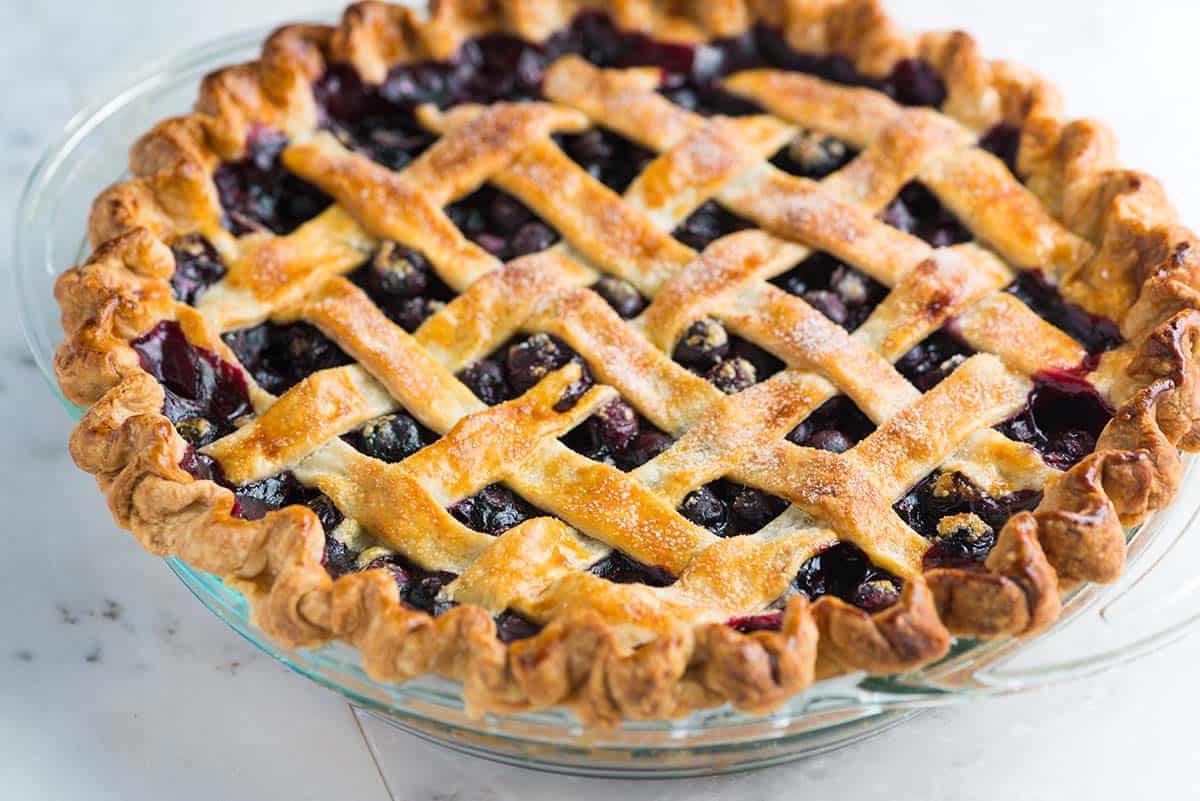
- Blueberry Pie
- Our Favorite Apple Pie
- Easy Cherry Pie
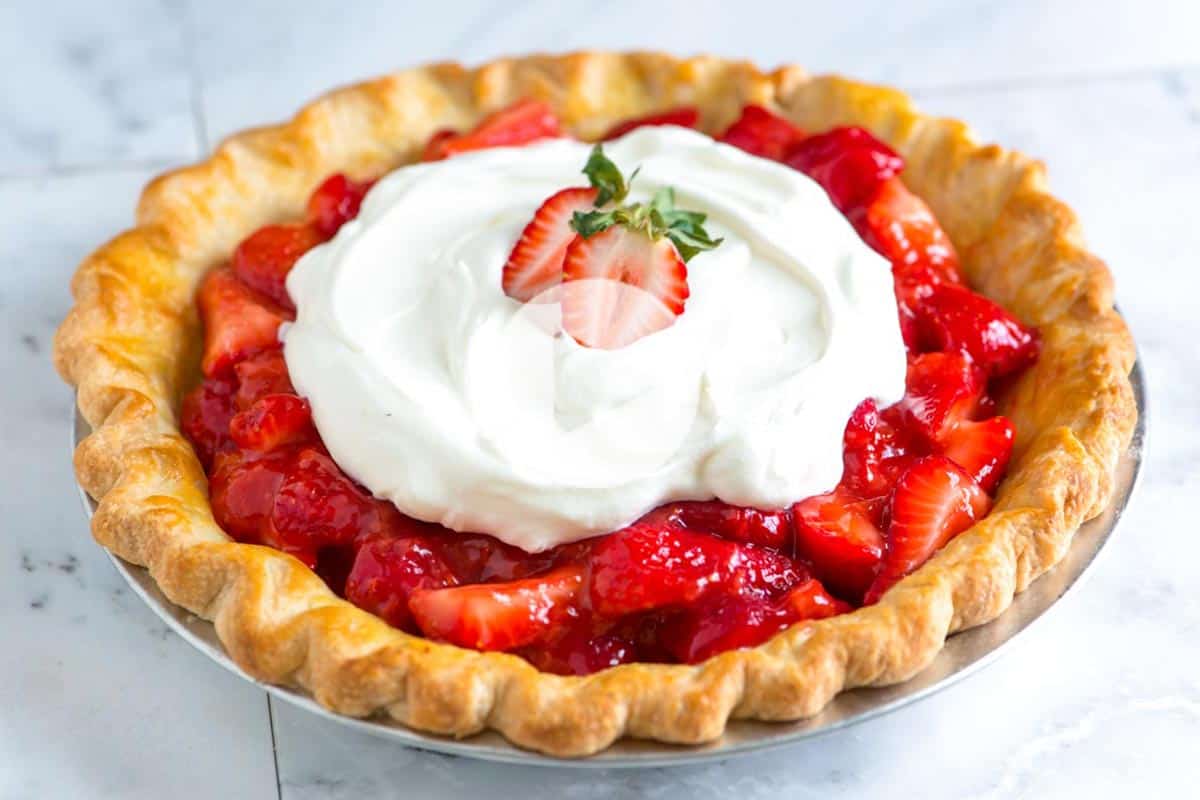
- Fresh Strawberry Pie
- Pumpkin Pie
- Sweet Potato Pie
- Easy Apple Tart
Easy Butter Flaky Pie Crust
- PREP
- TOTAL
Of all the pie crust recipes we have tried, this makes the most consistent dough. It’s also a dream to roll out. Using a food processor in this recipe eliminates variability. If you have one, use it. With that said, you can do this method by hand. Directions are provided below for using a processor and by hand.
Watch Us Make the Recipe
You Will Need
2 ½ cups (325g) all-purpose flour
1 teaspoon kosher salt or use 1/2 teaspoon fine sea salt
1 tablespoon sugar, optional
1 cup (230g) very cold unsalted butter, cut into 1/2-inch cubes (2 sticks)
4 to 8 tablespoons ice water, or more as needed
Directions
- Method When Using Food Processor
1Add 1 ½ cups flour, salt, and sugar to a food processor. Pulse 2 to 3 times until combined. The remaining cup of flour will be added later.
2Scatter butter cubes over flour and process until a dough or paste begins to form, about 15 seconds. (There should be no uncoated flour).
3Scrape bowl, redistribute the flour-butter mixture then add remaining 1 cup of flour. Pulse 4 to 5 times until flour is evenly distributed. (Dough should look broken up and a little crumbly).
4Transfer to a medium bowl then sprinkle ice water over mixture — start with 4 tablespoons and add from there. Using a rubber spatula, press the dough into itself. The crumbs should begin to form larger clusters. If you pinch some of the dough and it holds together, it’s ready. If the dough falls apart, add 2 to 4 more tablespoons of water and continue to press until dough comes together.
5Remove dough from bowl and place in a mound on a clean surface. Work the dough just enough to form a ball. Cut the ball in half then form each half into disks. Wrap each disk with plastic wrap and refrigerate for at least 1 hour and up to 2 days. You can also freeze it for up to 3 months (just thaw it overnight in the fridge before using it).
- Method When Making By Hand
1Add 1 ½ cups flour, salt, and sugar to a medium bowl. Stir 2 to 3 times until combined.
2Scatter butter cubes over flour and mix briefly with a fork or spatula to coat the butter with flour.
3Cut the butter into the flour with a pastry blender, working mixture until the flour has a coarse, mealy texture similar to fresh bread crumbs. About 1 – 2 minutes.
4Add remaining 1 cup of flour. Work butter and flour with the pastry blender until flour is evenly distributed. About 20 seconds. (Dough should look crumbly with pea-sized pieces).
5Sprinkle ice water over the mixture — start with 4 tablespoons and add from there. Using a rubber spatula, press the dough into itself. The crumbs should begin to form larger clusters. If you pinch some of the dough and it holds together, it’s ready. If the dough falls apart, add 2 to 4 more tablespoons of water and continue to press until dough comes together.
6Remove dough from bowl and place in a mound on a clean surface. Work the dough just enough to form a ball. Cut ball in half then form each half into disks. Wrap each disk with plastic wrap and refrigerate at least 1 hour, and up to 2 days. You can also freeze it for up to 3 months (just thaw it overnight in the fridge before using).
- Rolling Out Dough
1Remove one of the dough disks from the refrigerator and let sit at room temperature for 5 minutes.
2Lightly flour work surface, top of dough and rolling pin. Then use rolling pin to roll out dough to a 12-inch circle (about 1/8-inch thick). Be sure to check if the dough is sticking to the surface below — add a small amount of flour when necessary.
3Check for size by inverting pie dish over dough round. Look for a 1-inch edge around the pie dish. To transfer dough to dish, starting at one end, roll dough around rolling pin then unroll over dish.
4Gently press dough down into dish so that it lines the bottom and sides of the dish. (Be careful not to pull or stretch the dough). Then, use a knife or pair of kitchen scissors to trim dough to within 1/2-inch of the edge of the dish.
5Fold edge of dough underneath itself so that it creates a thicker, 1/4-inch border that rests on the lip of the dish. Then, crimp edges by pressing the pointer finger of one hand against the edge of the dough from the inside of the dish while gently pressing with two knuckles of the other hand from the outside. Refrigerate dough at least 20 minutes or freeze for 5 minutes before baking.
6If making a double crust pie, do not crimp edges yet. Roll out second dough disk, fill pie then top with second dough round. Trim the edges then crimp.
- How to Blind Bake a Crust for a Single-Crust Pie (quiches & cream pies)
1Heat the oven to 425° F (218° C). Place a baking sheet on a middle oven rack.
2Roll out enough dough to make one 9-inch crust (1 dough disk). Place into a pie plate and then pierce the bottom of the crust with a fork (this prevent air pockets or bubbles from forming while baking). Line the crust with two sheets of aluminum foil or parchment paper. (Be sure to push foil against the edges of the crust). Then, fill foil with dried rice, dried beans or pie weights. Refrigerate 30 minutes or freeze for 10 minutes, or until firm to the touch.
3Place pie crust onto preheated baking sheet and reduce oven temperature to 400° F (204° C). For a fully baked crust, bake 20 to 30 minutes or until the crust is golden. For a partially-baked crust (a crust that will be baked again, like a quiche), bake until the bottom crust is just beginning to brown, 5 to 10 minutes.
4To add a shiny exterior to fully baked crust, make an egg wash by whisking one egg yolk and 1 tablespoon of cream in a small bowl. Then, remove rice, beans or pie weights and foil from pie crust. Brush the bottom and sides of the crust with egg wash. Bake until egg wash is dry and shiny, 3 to 5 minutes. Cool crust completely before filling.
- How to Make a Double Crust Pie
1Oven temperature and bake time for double crust pies will vary depending on the pie recipe you plan to follow. As an example, we set our oven to 400° Fahrenheit for our double crust cherry pie (see the recipe here).
2Remove half of dough from refrigerator and let sit at room temperature for 5 minutes. On a lightly floured surface, roll out dough to a 13-inch (1/8-inch thick) circle.
3Check for size by inverting pie dish over dough round. Look for a 1-inch edge around the pie dish. Carefully press the dough into the dish. Spoon the pie filling into pie crust.
4Roll out second half of dough then top pie. Use a knife or pair of kitchen scissors to trim dough to within 3/4-inch of the edge of the dish.
5Fold edges of top crust underneath edges of bottom crust, pressing the edge to seal it so that it creates a thicker, 1/4-inch border that rests on the lip of the dish. Then, crimp edges by pressing the pointer finger of one hand against the edge of the dough from the inside of the dish while gently pressing with two knuckles of the other hand from the outside. Refrigerate pie at least 20 minutes or freeze for 5 minutes before baking.
6Just before baking, make egg wash by whisking egg yolk and cream together in a small bowl. Use a pastry brush to brush over the top crust. Then, sprinkle with 1 tablespoon of sugar. Then, cut 3 to 4 slits in top of pie. Bake as directed by the specific recipe you are following.
Adam and Joanne's Tips
- Recipe inspired by this easy pie dough. The method for creating the flour paste is inspired by Cooks Illustrated and Kenji López-Alt. Their original recipe also includes vodka, but we do not add this ingredient.
- The nutrition facts provided below are estimates.
You May Also Like...


I used this pie crust recipe this weekend to make as a base for quiche. It turned out great wonderful. I used the other half of the dough that I had refrigerated to use for making an apple pie with my canned apple pie filling. The pie crust was perfect! I want to thank you for sharing this recipe and also for making a companion video I found it very helpful!
We are so glad the video was helpful and thrilled that you loved the recipe 🙂
This pie crust recipe is the best one I have ever tried. Easy to make and comes out PERFECT. Thank you!
Wonderful! 🙂
I used this recipe and this was the first time I have ever made my own crust! It was the Best I was very impressed and my husband said I don’t have to buy any crust from now on I can make my own. Thank you for sharing!
You have made our day with this review 🙂
Woohoo! The only pie crust recipe I need! It turns out I CAN make pie without the dreaded “soggy bottom”. This crust is amazing – flavorful, tender and actually crisp! Thank you for the detailed technique and video demonstration, so helpful. Does this recipe work as well if I make a single crust instead of double? One comment, I had plenty of dough scraps left over after rolling for a 9.5 inch deep pie dish (double crust too).
That’s wonderful news, Debby!
I am a chef, in the business for over thirty years now. I’ve done quiche before; but we used patte brisee. So, obviously the guess work was taken out. This was my first time making a crust from the muscle. I was concerned with how pretty it was (apple pie) just that I made a good crust. This was DELICIOUS and your instructions made it feel easy. 👌🏿👌🏿
Thank you so much for coming back and leaving such a thoughtful comment, David! So happy the recipe worked so well for you.
thanks so much for sharing this pie crust recipe!! I had many flops and frustrations till I found this step by step recipe. It couldnt be better explained.
Super pie crust
Thanks!
Saved to my favourites a couple of years ago, just tried making it. And, oh my. Totally lovin it, thank you for sharing!!! The crust is just amazing, is light, flaky and has that caramelized butter taste that is sooo addictive
Wonderful! So glad you love it 🙂
This has to be the best pie crust I have ever made and tasted so crispy and flakey
I followed this recipe to the letter (omitting optional sugar because this was for chicken pot pie) and it came out FABULOUS! This pot pie is one of the best things I’ve ever made, and the crust looked and tasted wonderful! Thank you so much for the video, really helped me to get it right (lifting the crust, crimping, etc). I will never use store bought crust again. Easy with the food processor.
I first used this pie crust recipe during the ’23 winter holidays with a spiced apple pie recipe. The spiced apple filling was a dud unfortunately, yet many commented “… but that pie crust was exquisite!”
Hi Ray, Thanks for coming back and letting us know! Sorry you didn’t enjoy the filling, but I’m thrilled you and your guests loved the crust!