How to make perfect poached eggs. I learned this foolproof method years ago and never looked back. It’s so easy, anyone can do it!
Poached eggs are one of those things I think people are scared to make at home, and I’m here to tell you that you can! Not only that, but once you try our easy method for poaching eggs, you’ll want to do it again and again!
Use this poached egg recipe to make eggs for a healthy breakfast or dinner. I love them with eggs Benedict, avocado toast, grits, and pasta, and served simply with buttered toast, these homemade English muffins, or with breakfast sausage.
How to Make Poached Eggs
To make poached eggs, you will need a wide pot, eggs, a bit of salt, and some vinegar (optional, I’ll explain below).
Fill your pot at least 4 inches deep with water and bring to a gentle simmer. Add a generous pinch of salt and a little bit of vinegar. The salt helps season the eggs, and the vinegar helps the egg whites stay together while they poach. The vinegar is optional, but I use it when I poach eggs. (We only use 1 tablespoon, which isn’t enough to flavor the eggs.)

Break each egg into a clean ramekin or cup as the water heats up. I don’t recommend cracking your eggs directly into the water.
Check your pot of water and adjust the heat so that it is just barely simmering. I like to see little bubbles at the bottom of the pan, with a few actually making their way to the top to burst.
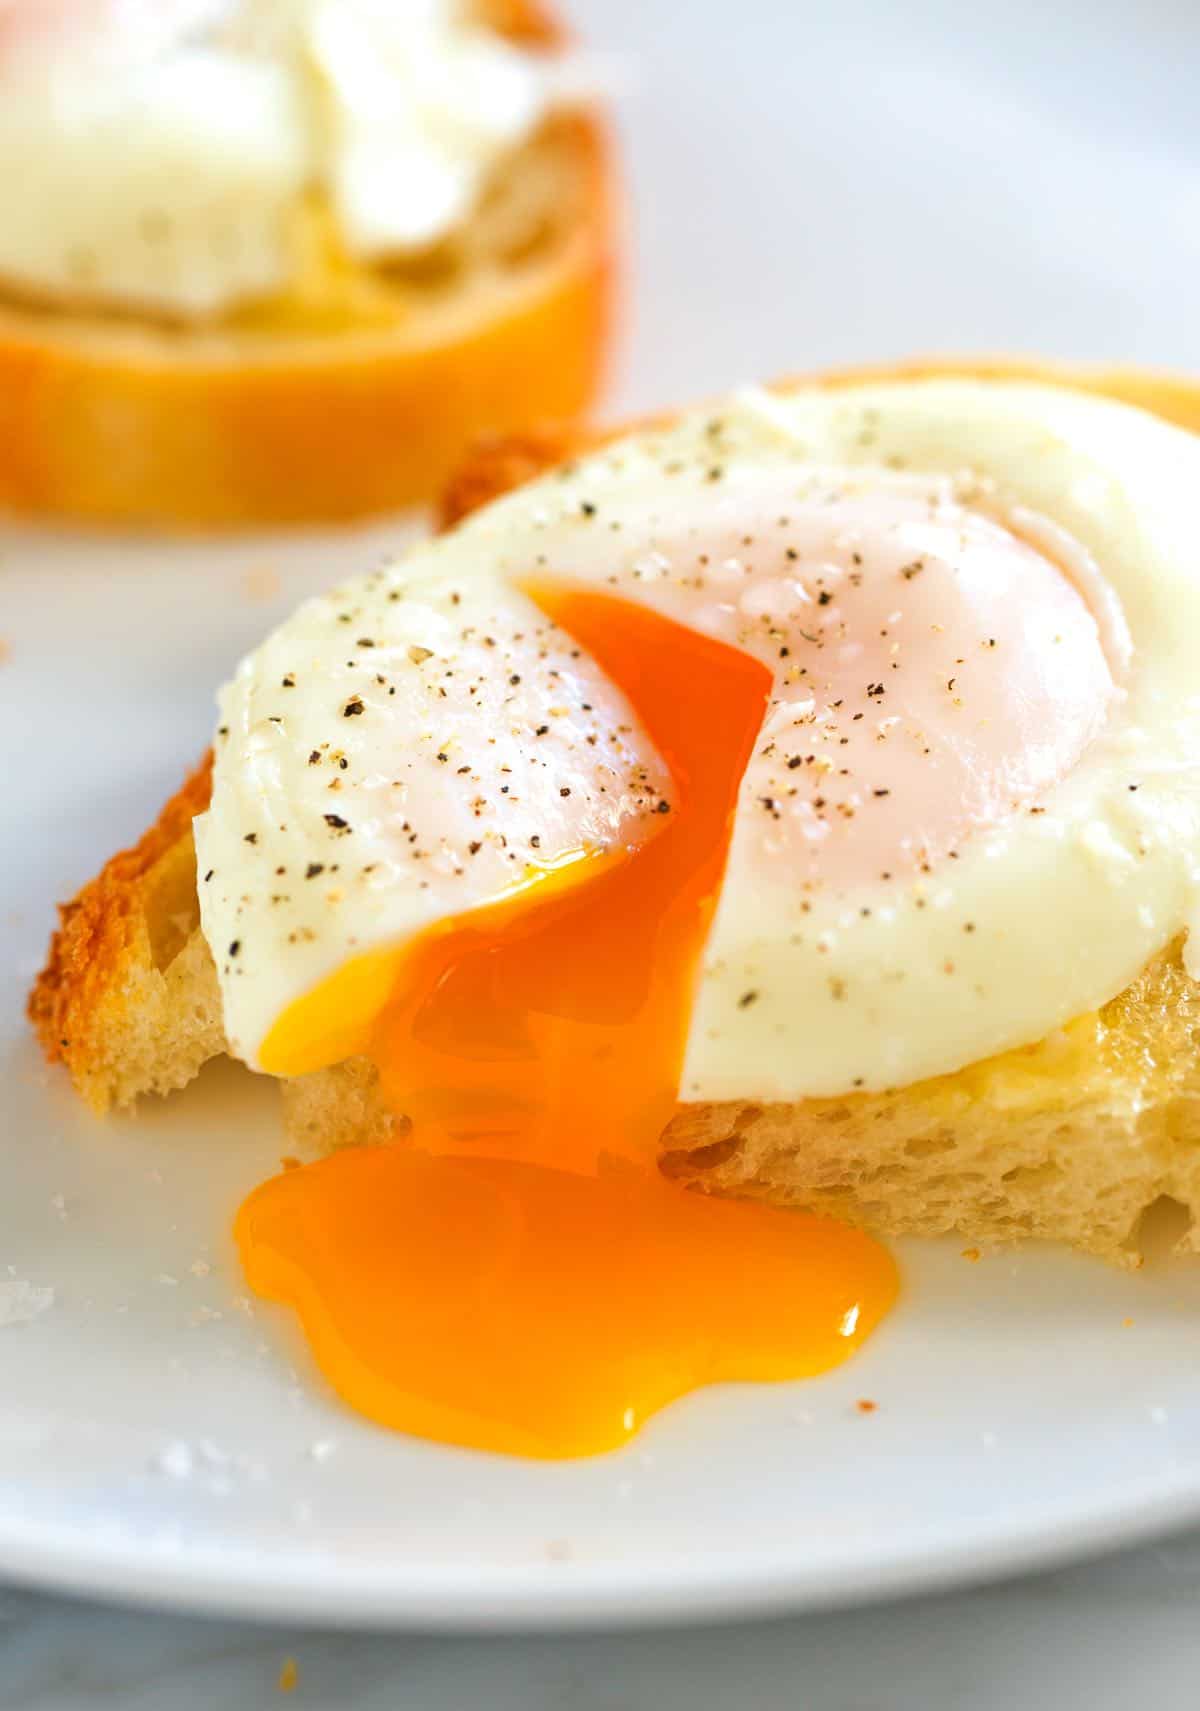
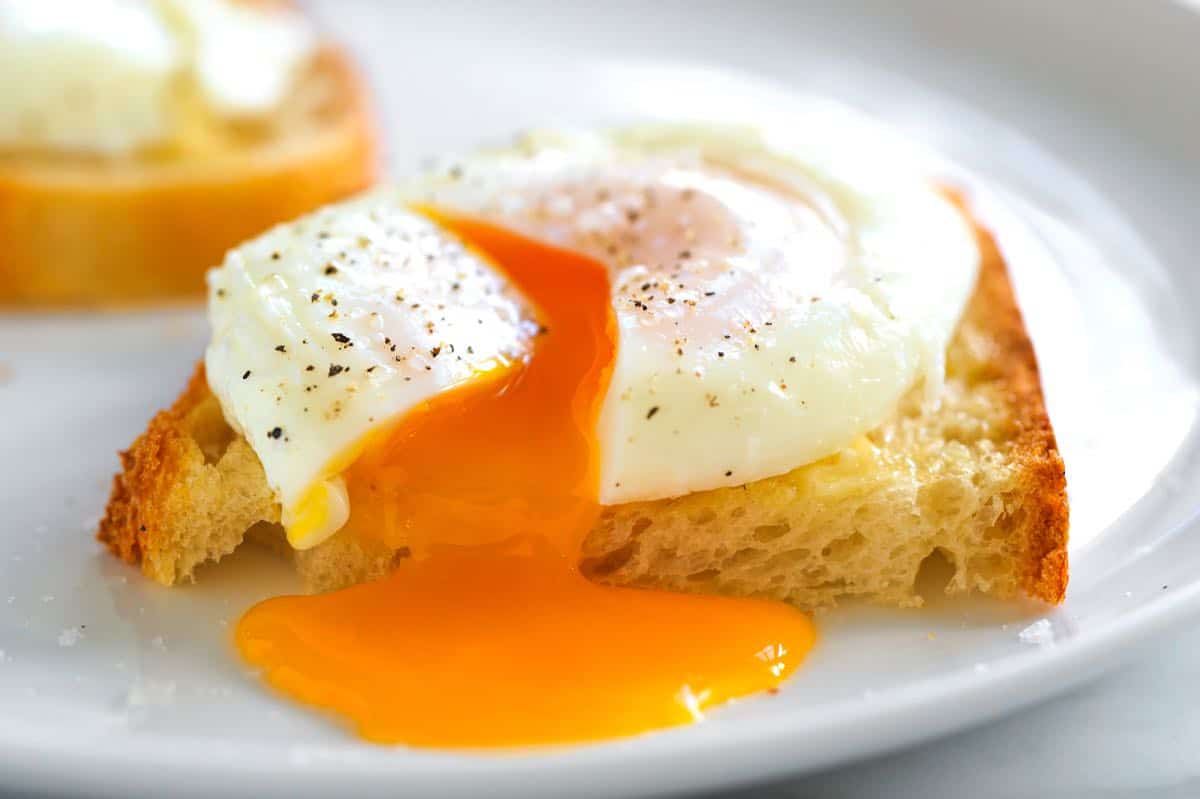
Carefully slide your eggs, one at a time, into the water, and then set a timer for 3 to 4 minutes, depending on how runny you want your yolk (3 minutes is completely runny like our photos, while 4 minutes has some firmer yolk with a soft center).

Use a slotted spoon to remove the eggs from the water. Let them sit on paper towels for 20 seconds to firm up and blot away excess water. Season with salt and pepper, and enjoy!

Using a fine mesh strainer: If you have trouble with wispy white bits around your eggs as they are poaching, use this simple trick! Before poaching, crack your egg into a fine-mesh strainer held over a bowl. The thinnest, runniest part of the white will go through the strainer, leaving behind the thicker white that sets nicely when poached. Your poaching water will be cleaner, and your eggs will have a more well-defined shape.
Easy Poached Eggs
- PREP
- COOK
- TOTAL
This is our easy recipe for poached eggs. You can poach as many eggs as you need to. If you poach multiple eggs at a time, try not to crowd the water. It might be better to make more than one batch. Fresh eggs work best for this since they hold their shape better than older eggs. Think of the vinegar as a fail-safe. It helps to firm the whites and keep their shape. If you do not want to add it, you can still make poached eggs without it.
You Will Need
1 fresh egg (or more)
1 tablespoon white vinegar or rice wine vinegar, optional
1/4 teaspoon fine sea salt, optional
Directions
1Line a small baking sheet or plate with paper towels or a clean dish towel.
2Fill a wide saucepan at least 4 inches deep with water and bring to a boil over high heat.
3Lower the heat to low and bring the water to a very gentle simmer. Bubbles should form at the bottom of the pan, but only a few will actually break on the surface.
4Add the vinegar and salt to the water (optional).
5Crack the egg into a small bowl and carefully slide it into the water. Set a timer for 3 to 4 minutes (3 minutes for completely runny yolks). After 20 seconds, use a spoon to carefully push the egg white up over the yolk, making it more compact.
6Transfer the poached egg with a slotted spoon to the lined baking sheet or plate and leave for 15 to 20 seconds before serving.
Adam and Joanne's Tips
- Make Ahead: You can poach eggs ahead of time (perfect for brunch or an easy breakfast)! To do this, poach the eggs as directed in our recipe, then carefully transfer them to an ice water bath to cool quickly. Refrigerate the eggs in a covered container submerged in the water for up to 3 days. When ready to serve, fill a pot or cup with very hot (not boiling) water and add your chilled poached eggs. Leave them for about 30 seconds, and then serve.
- Cook time: 3 minutes is completely runny, while 4 minutes has some firmer yolk with a soft center.
- Watery egg whites: If you have trouble with wispy white bits around your eggs as they are poaching, use this simple trick! Before poaching, crack your egg into a fine-mesh strainer held over a bowl. The thinnest, runniest part of the white will go through the strainer, leaving behind the thicker white that sets nicely when poached. Your poaching water will be cleaner, and your eggs will have a more well-defined shape.
- Nutritional information are estimates.


Thanks for the tips! Looks like the vinegar keeps the egg white from spreading; first try making a poached egg and came out right by following the recipe.
Great tips hope I can get it better next time
I love to cook and try new recipes.
Thanks great, Lesley!
Great photos! I’ve never scooched the whites over the yolk so mine always awkwardly spread out. Thanks for the tip!
Hi Emily, I do it carefully, and wait for 20 seconds before doing it, but it works nicely.
Tks,Like this!
Thank you so much for showing how to poach an egg! Incredible with the tips given! Hopefully I can make it too.
You’re so welcome! Hope it helped.
Love this post! Great how to!